In this article, we would like to show you the process of creating icons in Photoshop using Pen Tool and Brush. We will use an example of the ‘Infinity’ icon that was used in the design of our new WordPress Design page.
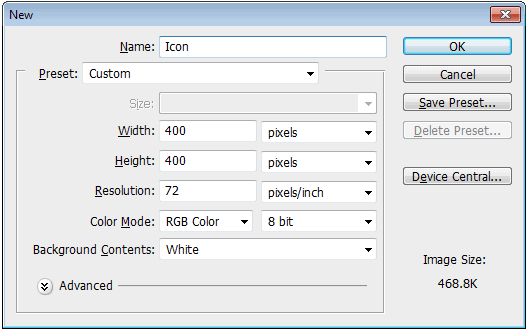
Create a new 400x400px document with a white background (Ctrl+N).
Step 2
Draw the initial shape of the Infinity sign and cut out 2 hollow shapes in the middle.
Use the Pen Tool (P) to draw a base layer of the Infinity sign and name it simply as ‘base’. Activate the layer by left clicking the ‘base’ mask.
Then select the Pen Tool with the following settings and cut out the hollow spaces inside the shape area.
Tips: You may also use ‘∞’ sign, which is included in many fonts. That will remove the need to manually draw the figure.
Step 3
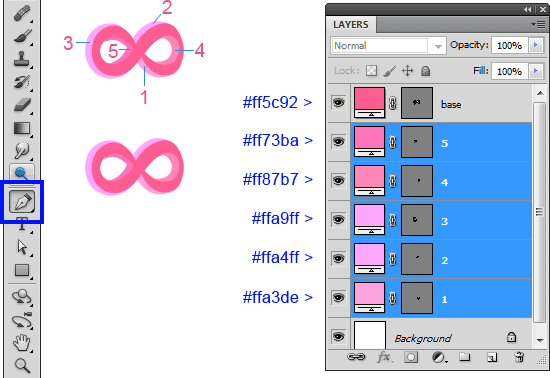
Using the Pen Tool draw 5 additional layers to give a “3D” effect to the icon. Name the layers as ‘1’,’2′,’3′,’4′ and ‘5’ and fill them with the colors as shown on the image below:
Step 4
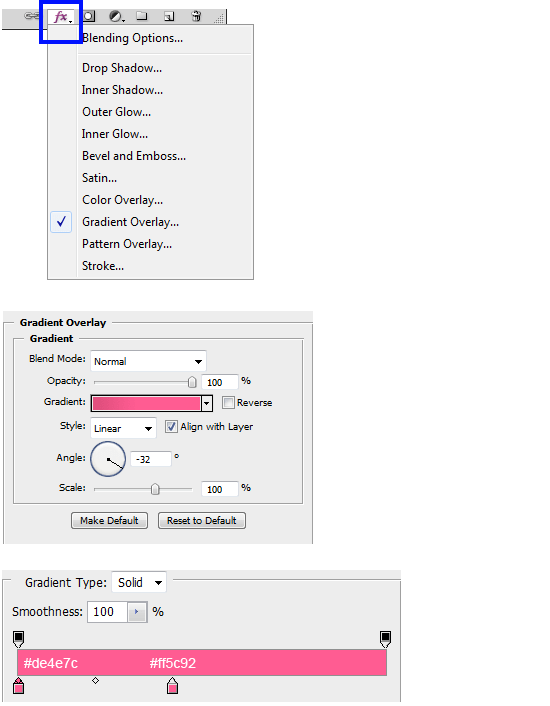
Add a Gradient Overlay layer style with the following settings to the ‘base’ layer.
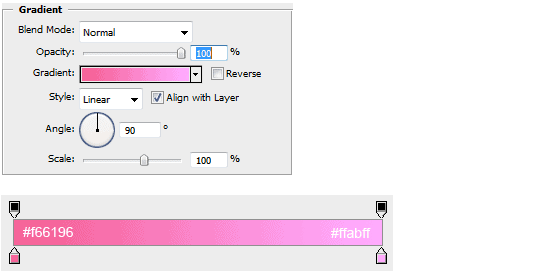
Step 5
Now add a Gradient Overlay layer style to layers ‘2’, ‘3’, and ‘5’ . Layer ‘2’:
Layer ‘3’:
Layer ‘5’:
The result should look similar to this icon.
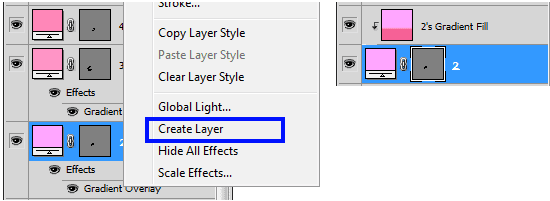
Step 6
Create new layers from the Gradient Overlay of the layers ‘2’, ‘3’ and ‘5’: right-click on each layer and select Create Layer option.
Step 7
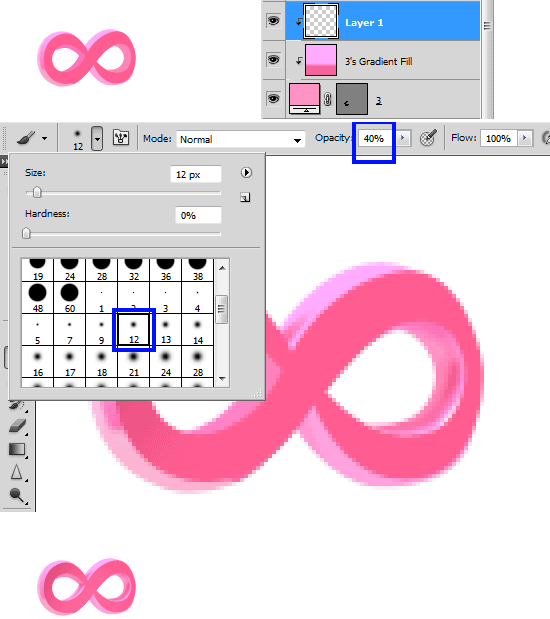
For layers ‘1’, ‘2’, ‘3’, ‘4’, ‘5’, and ‘base’ add highlights and shadows. For each of the layers, create a new layer (Ctrl+Shift+N) and group it with a default layer (Ctrl+Alt+G). Use a hard and soft brush to add highlights of various opacity (30-40%).
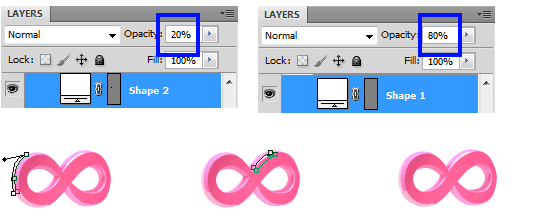
Step 8
Use the Pen Tool (P) to add additional highlights to the shape.
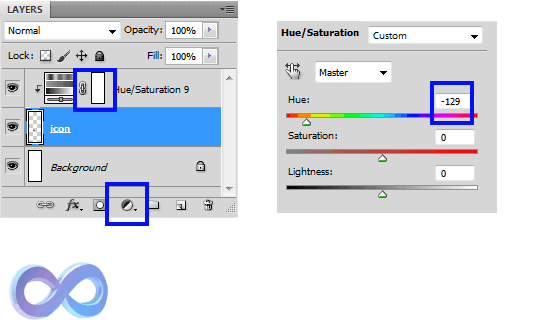
Step 9
Merge all layers (Merge Visible Layers option or Ctrl+Shift+E) and name a new layer as “icon”. Select Hue/Saturation parameter from the Layers panel and group this new layer with the “icon”. Apply the following settings to the color: Hue = -129, Saturation and Lightness = 0.
Step 10
Select Curves in the Layers options and group a new layer with the ‘icon’ layer. Add contrast using Curves.
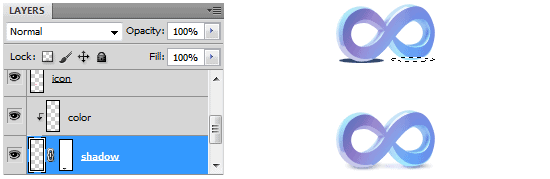
Step 12
Finally, add a shadow effect under the icon. Create a new layer (Ctrl+Shift+N) under the icon layer. Using the Elliptical Marquee Tool (Shift+M) create an oval, fill it with dark blue color and apply Gaussian Blur (Filter » Blur » Gaussian Blur) with radius 1.0.